Learn how to manage and find shared resources on the network.
Creating and Editing Resources
How to create and edit profiles for resources that you own. This can bring exposure to your resources and encourage collaboration between researchers.
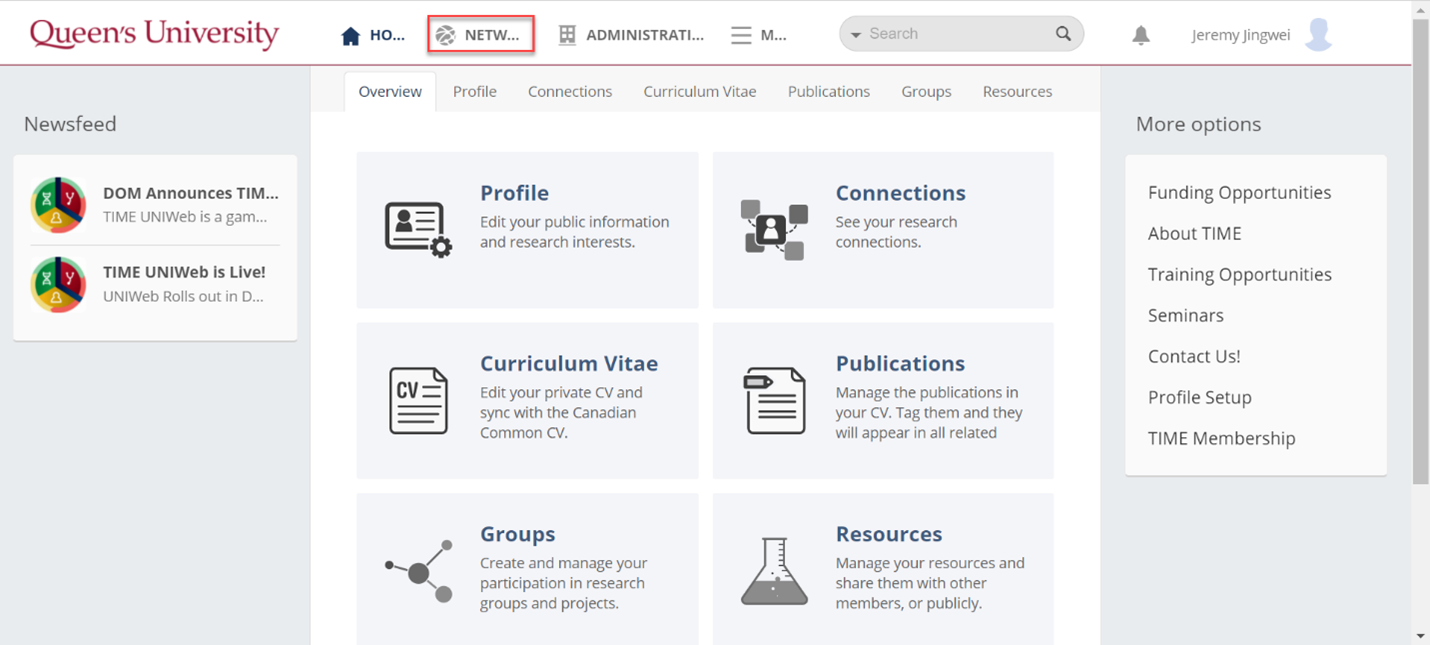
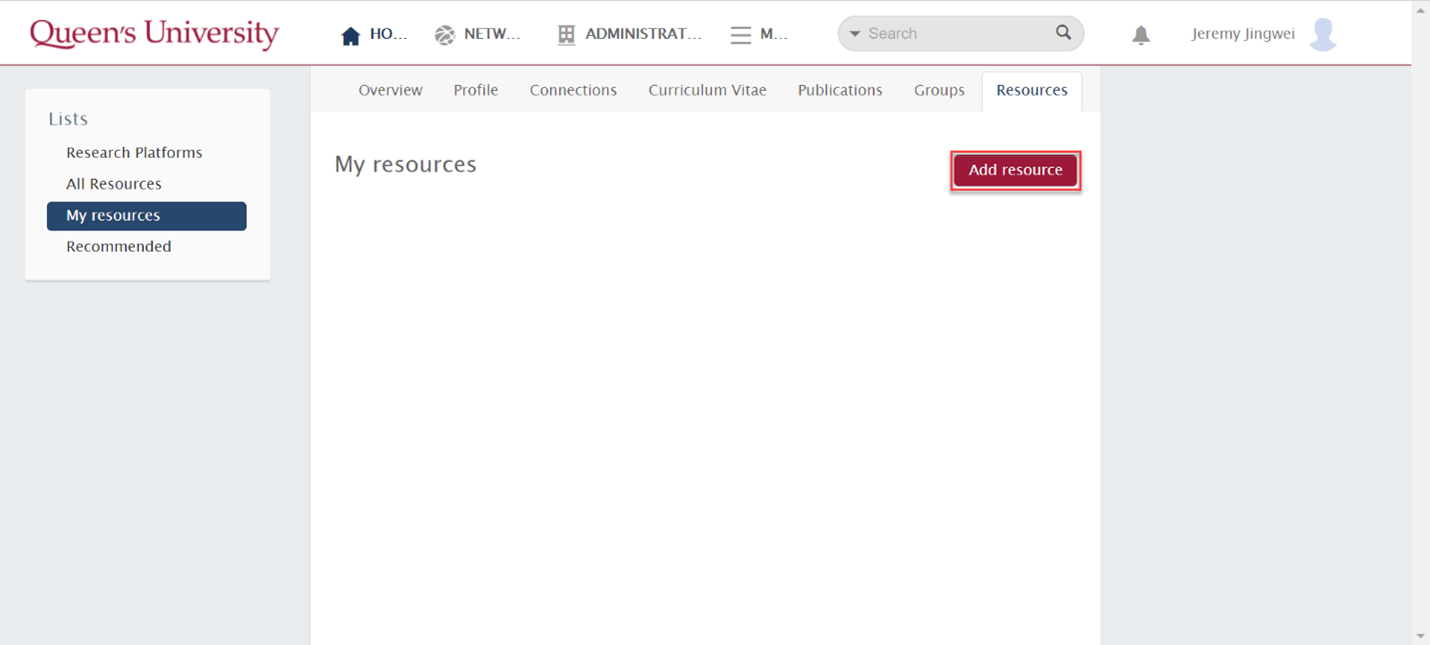
1. Click the Resources tile on your Overview tab.
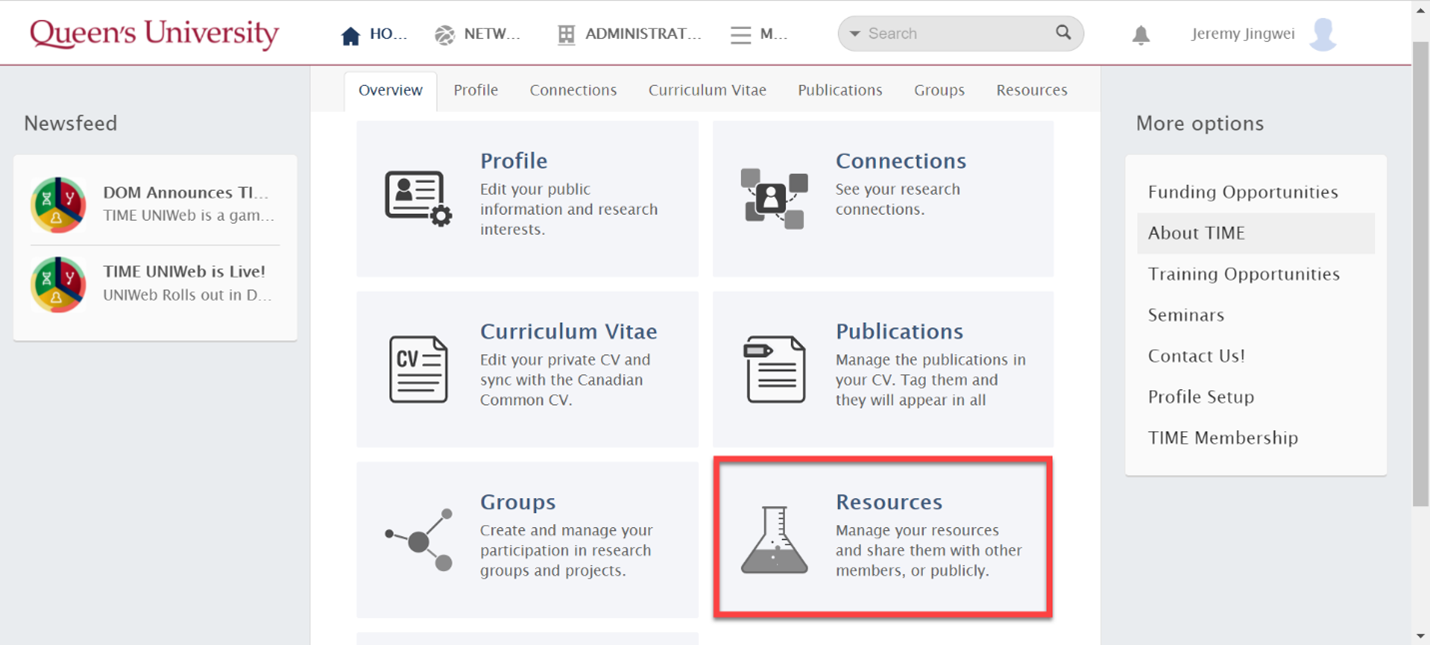
2. Select "Add Resource".
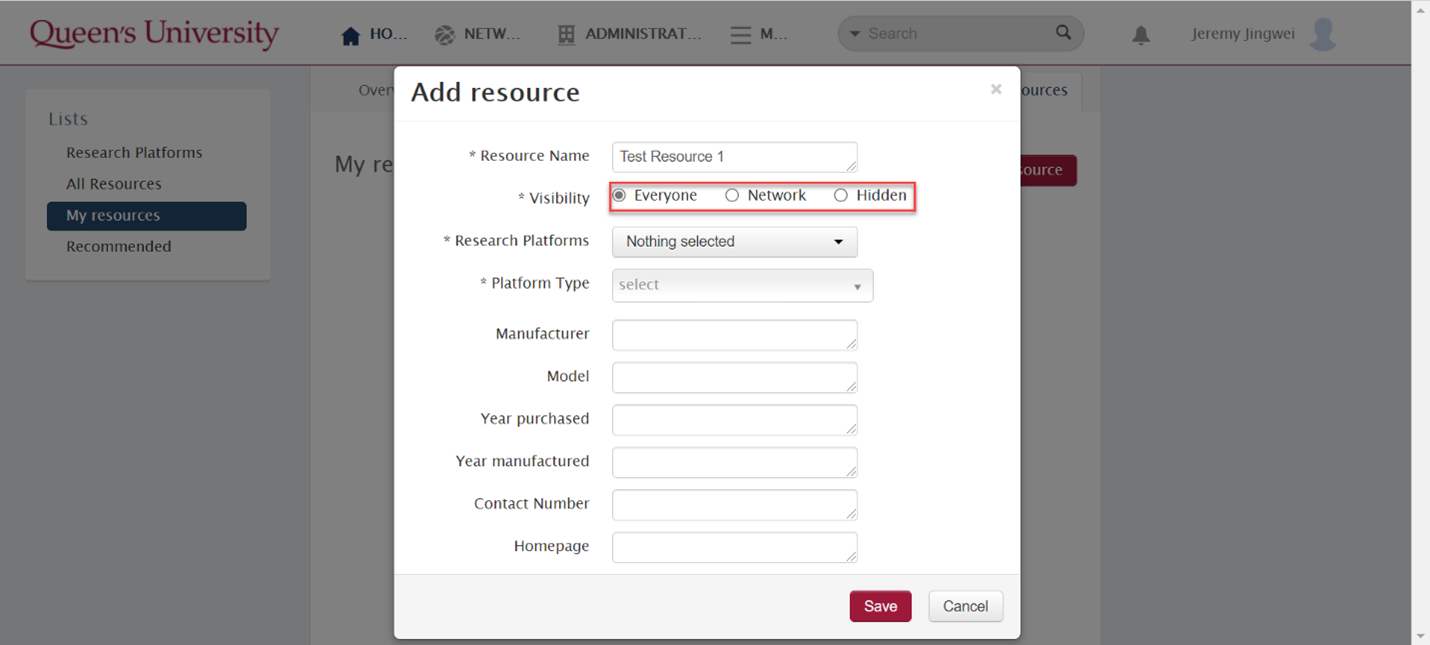
3. Type in the name of your resource.
4. Choose if you would like your resource to be Hidden (visible only to you), visible to those logged in to the Research Discovery Network, or visible to Everyone (can be viewed by the public).
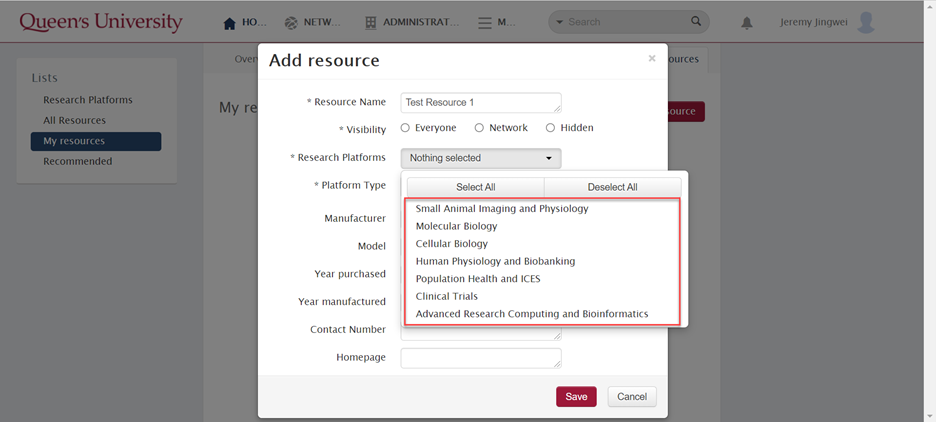
5. Select the Research Platform(s) that encapsulate your resource.
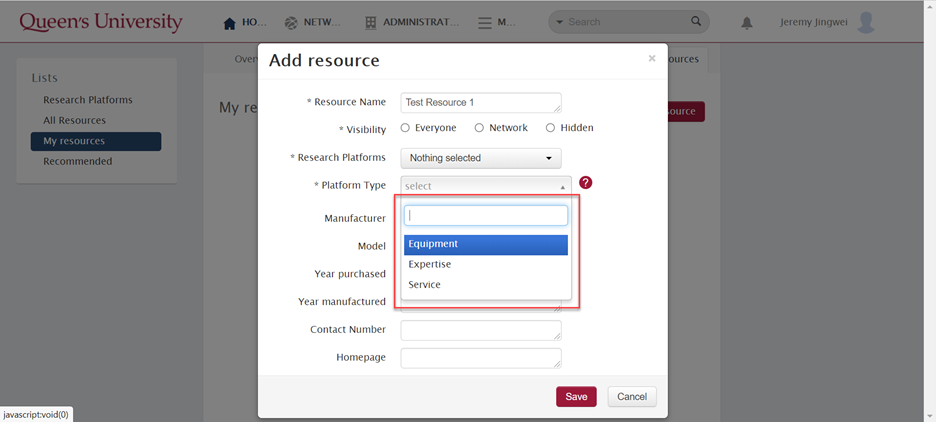
6. Select the Platform Type (Equipment, Expertise, or Service).
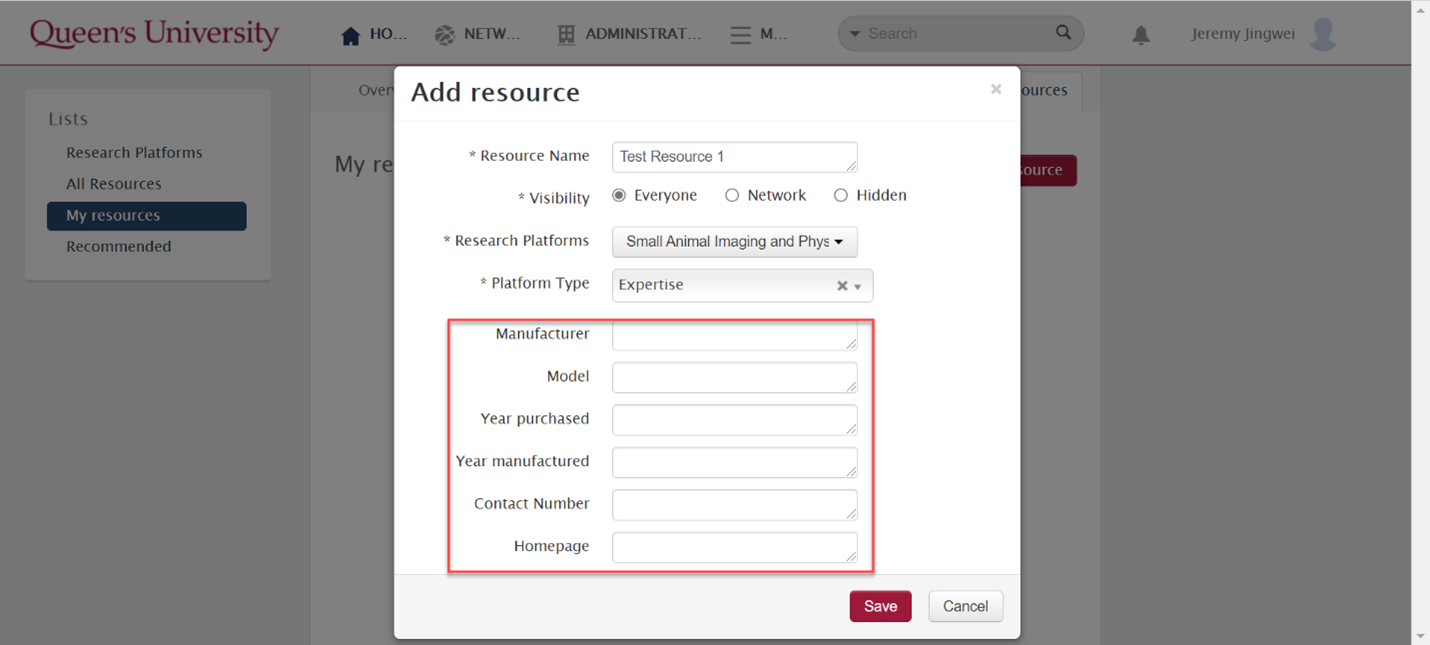
7. Fill in any optional details that you wish to be displayed on the resource's page.
8. Hit the red Save button.
9. You have now added your resource to the Queen's Research Discovery Network. If you selected Network or Everyone in the visibility field, others will be able to view your resource now on the Queen's Research Discovery Network.
1. After creating your resource on the Queen's Research Discovery Network, your resource page should now look like the image below.
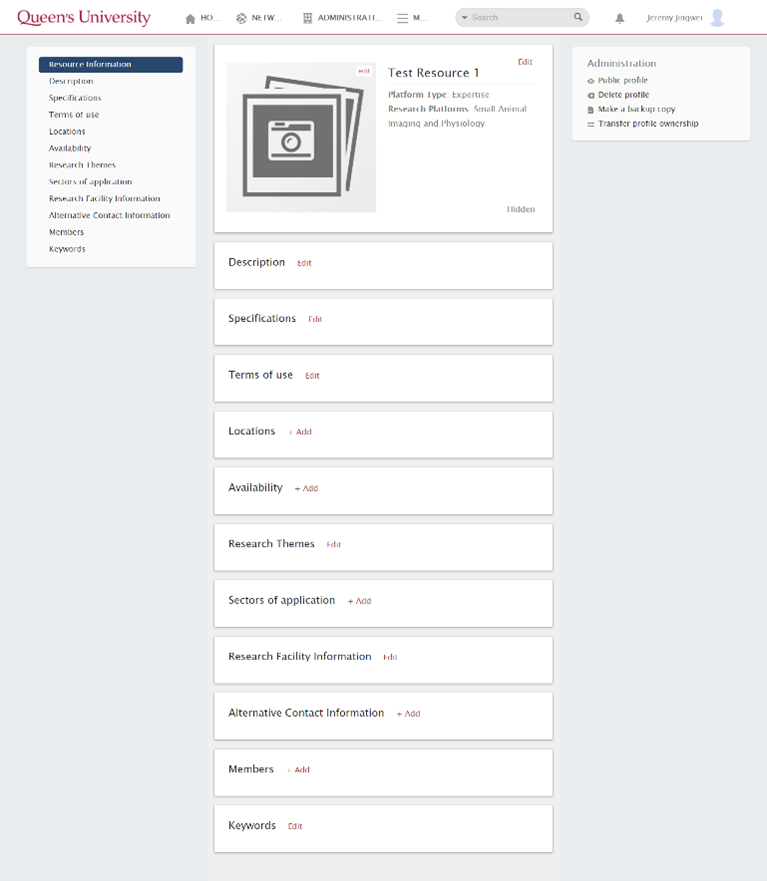
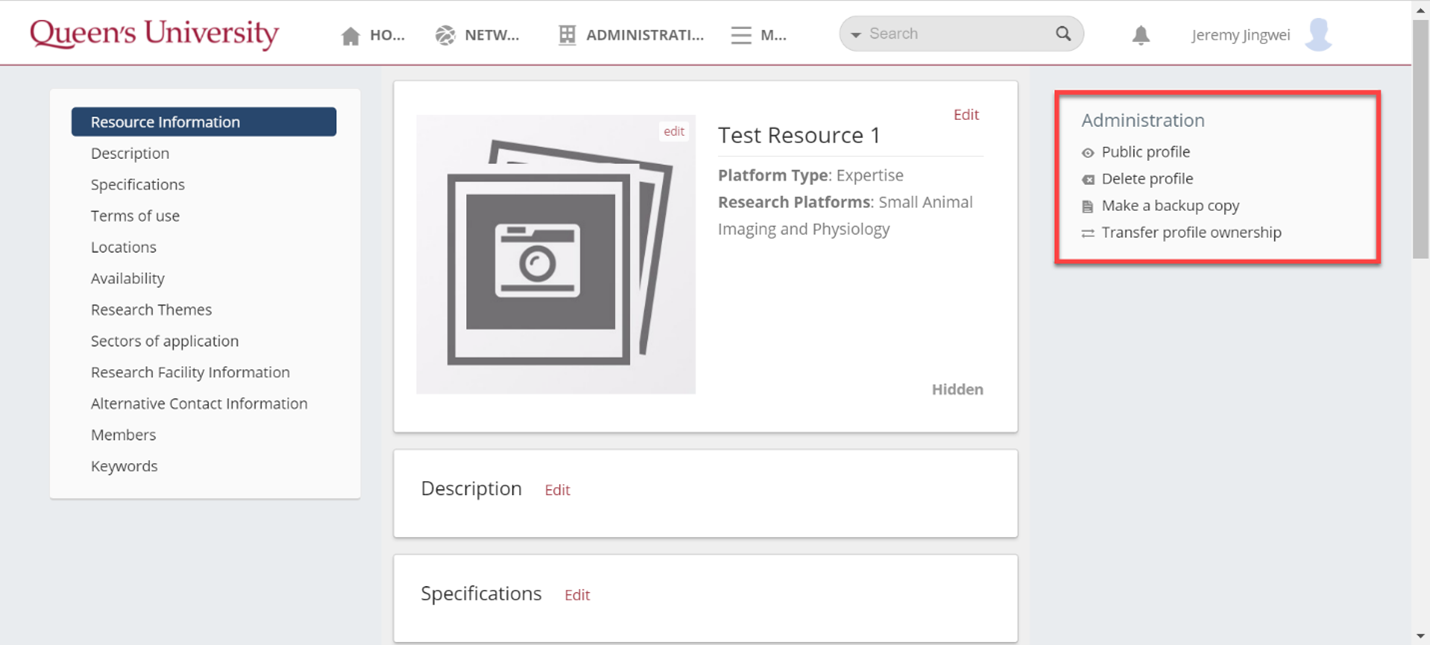
2. On the right sidebar, you can select options to view the public version of the resource profile, delete the resource profile, or transfer ownership of the resource profile to another Queen's Research Discovery Network user.
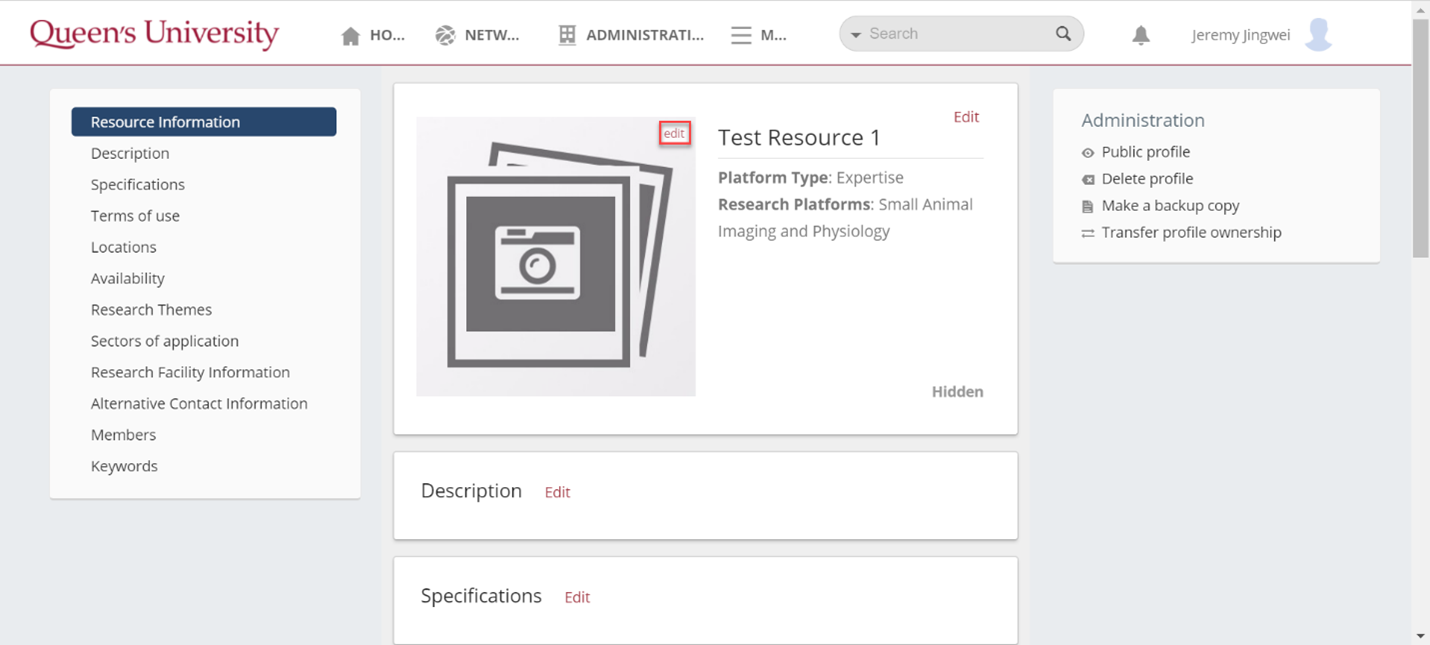
3. To add an image of your resource, select the "Edit" button on the image placeholder. Then, choose the image you wish to display, crop the image if necessary, and hit the red "Save" button.
4. Fill out the Description section of your resource profile by providing a short description of your resource. As a best practice, try to limit the description to 1-2 paragraphs.
5. Fill out the Specifications section of your resource profile by attaching a specifications sheet or manual for the equipment.
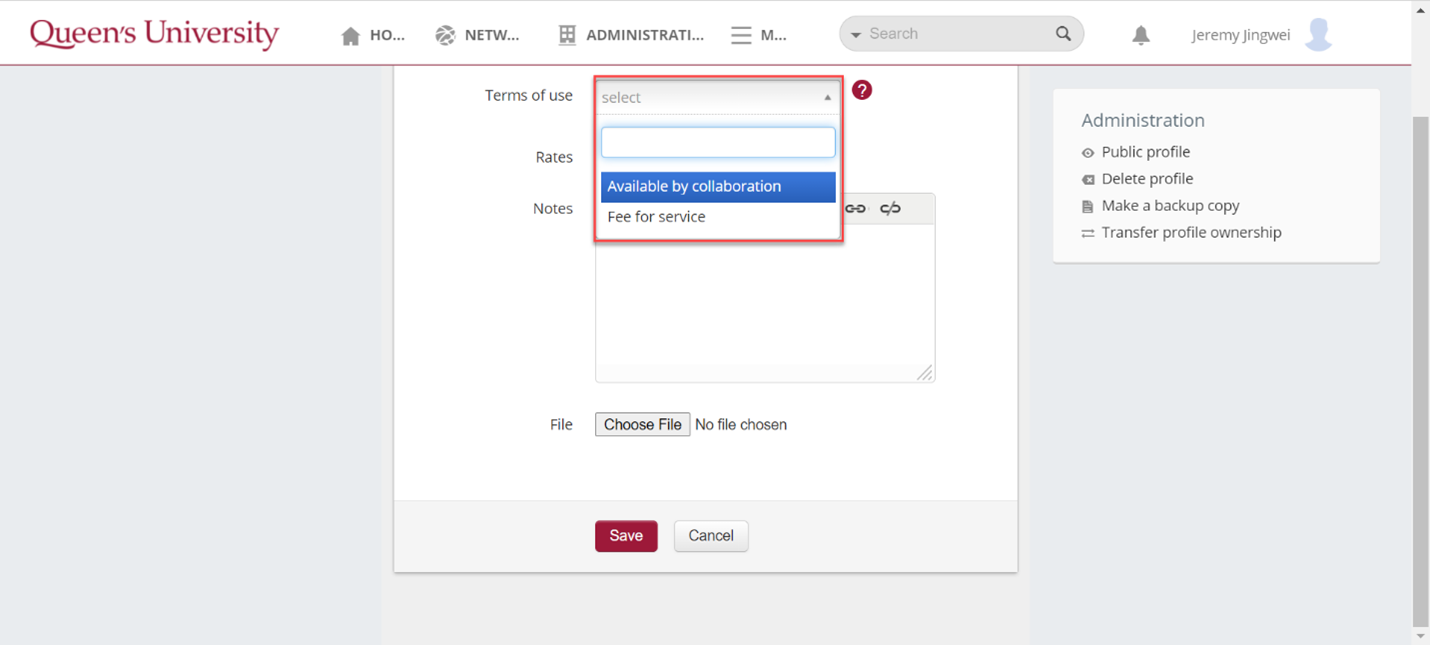
6. Complete the Terms of Use section by selecting whether the resource is Available by Collaboration or Fee-For-Service. If there are costs associated with the resource, fill out the Rates field accordingly.
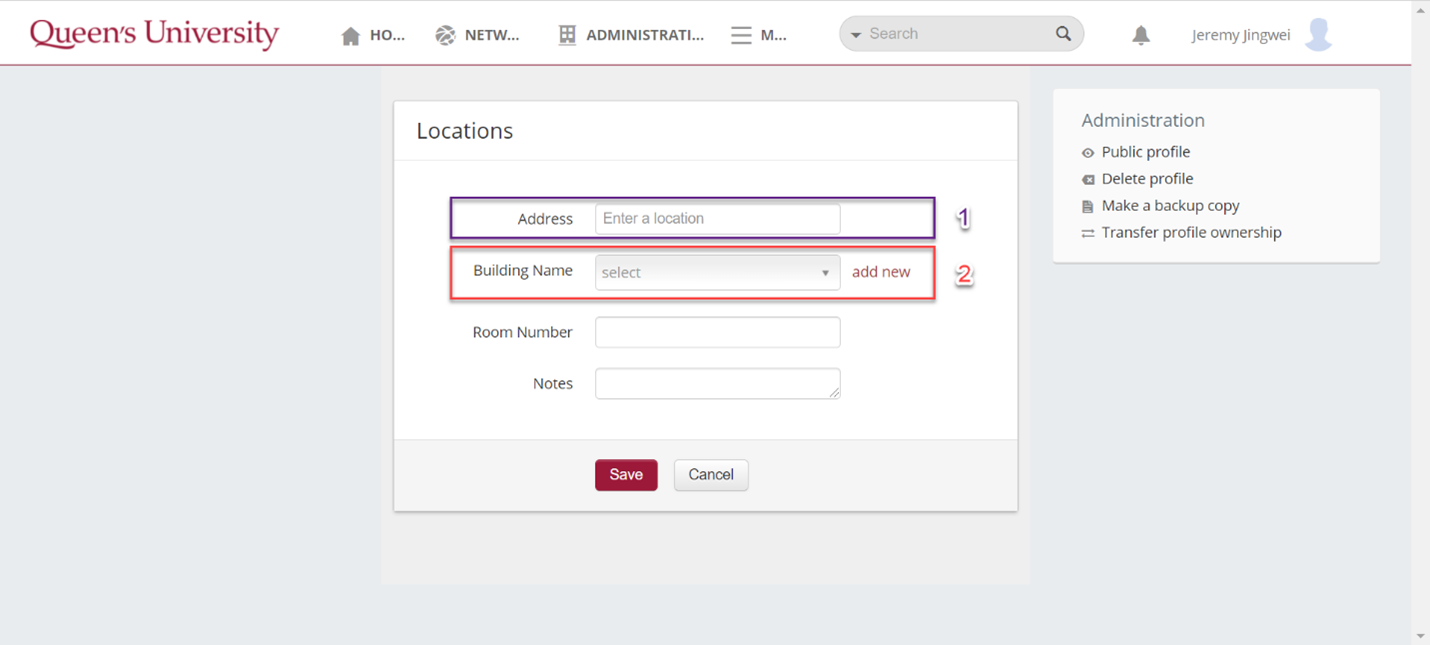
7. Fill out the "Locations" field by either: 1) filling in the full address of the resource into the "Address" field, or 2) Selecting the Queen's University Building Name in the "Building" field. Then fill in the room number if necessary.
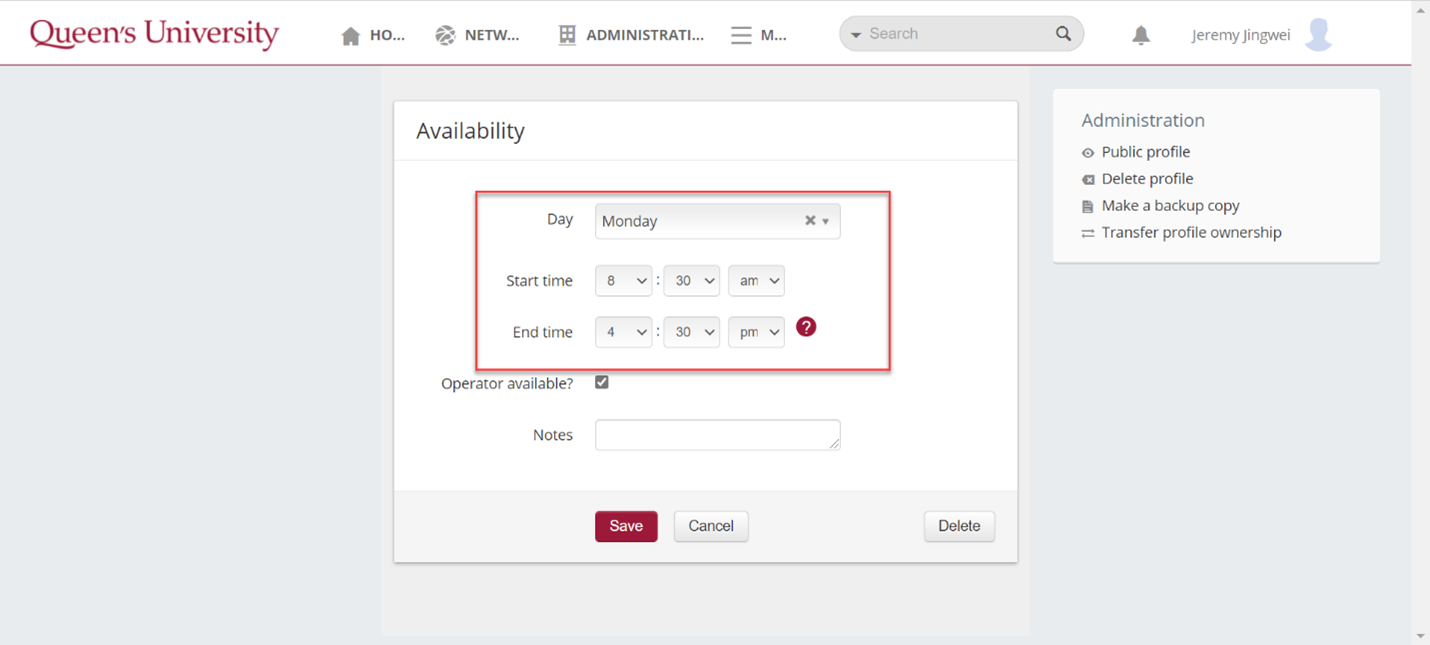
8. There are two options when completing the "Availability" profile section. 1) Fill out the availability of the resource for each day of the week using the "Day", "Start Time", and "End Time" fields or 2) Type out the availability of the resource in the "Notes" field.

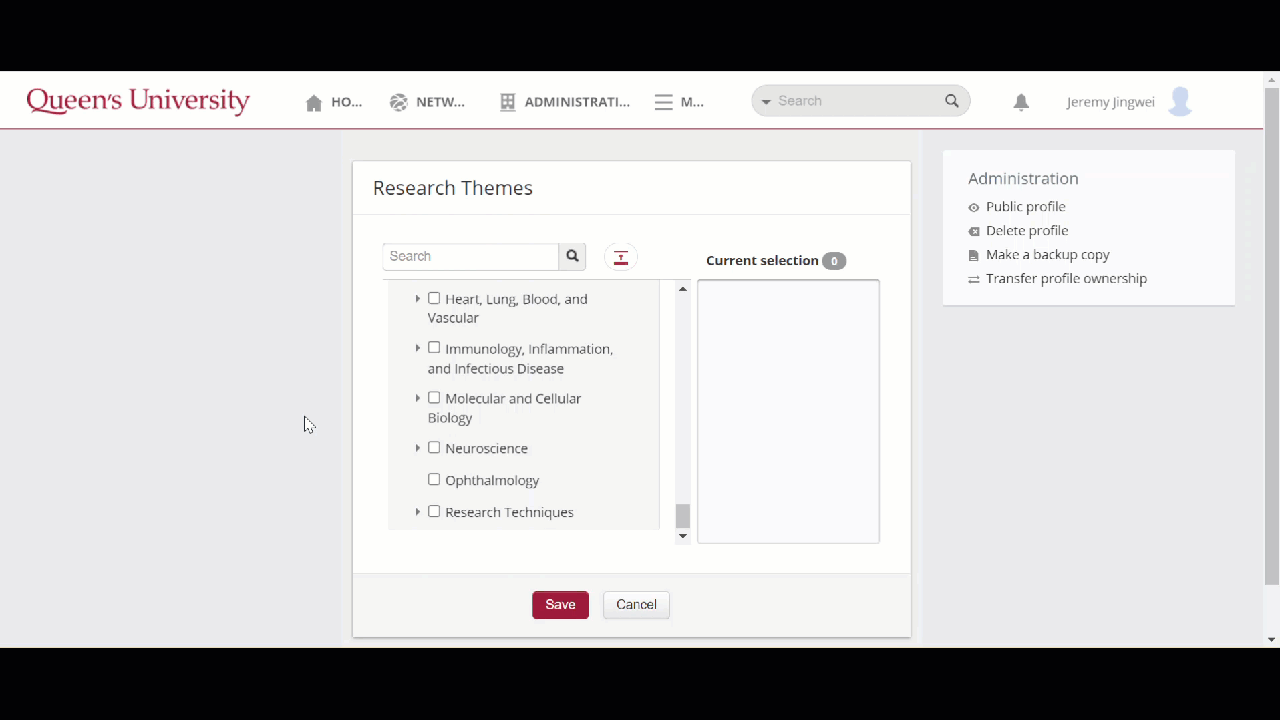
9. The "Research Themes" section allows you to tag your resource profile with relevant research themes - doing so ensures that the resource will appear in searches of the network for those themes. Click the chevron icons to the left of research themes to view their sub-themes. Select the theme(s) that apply to your research resource by selecting the checkboxes beside the research theme. This will add them to the "Current Selection" window, so that you can keep track of your selections while browsing. When finished, click the "Save" button.

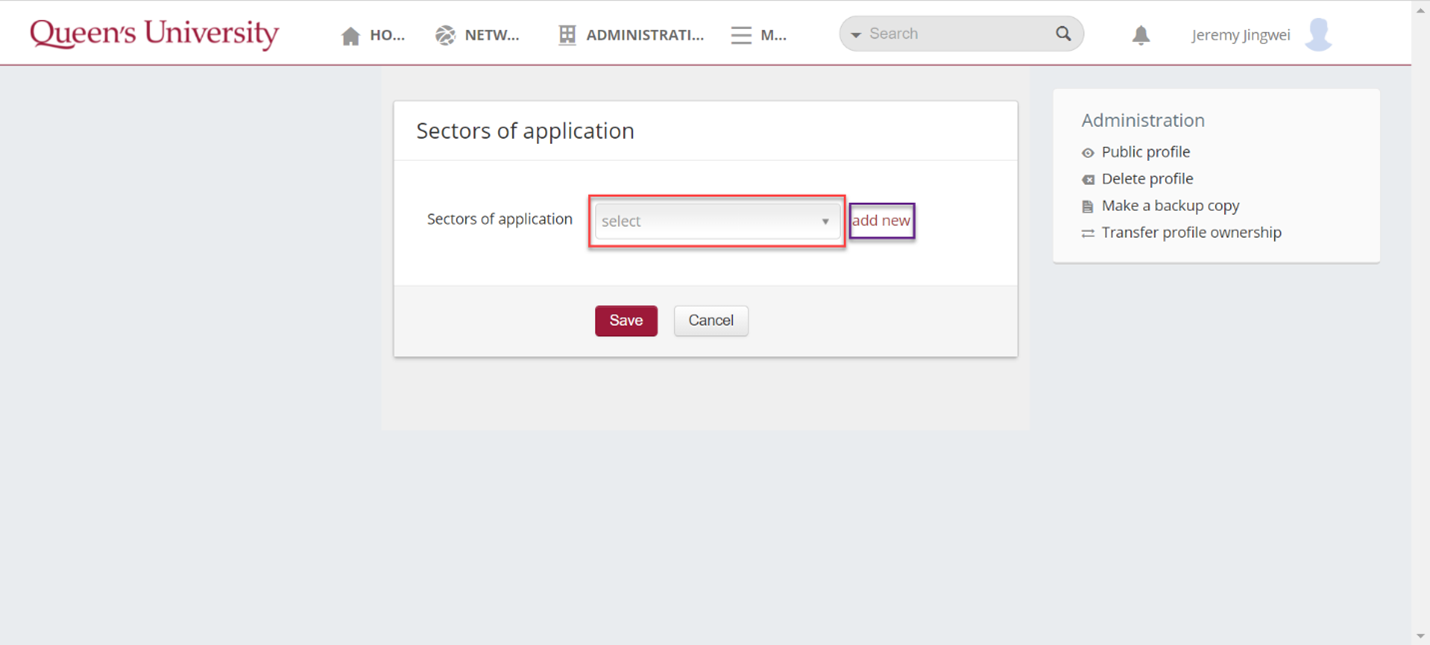
10. To complete the "Sectors of Application" section, click the drop-down select menu and choose the appropriate sector related to the resource. If none apply, you can choose to create a custom sector by selecting "Add New" and filling out the custom sector name.
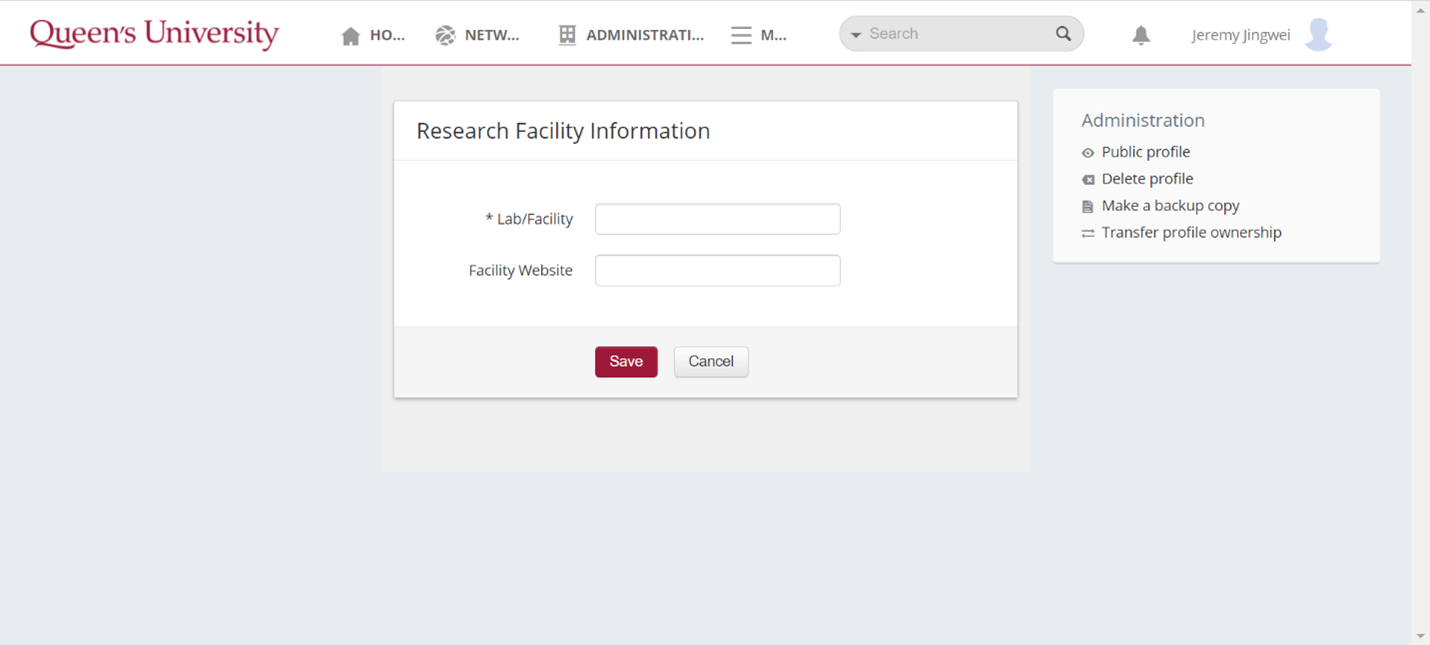
11. To populate the "Research Facility Information" section, type in the name of your lab/facility into the corresponding field. If you wish, you can include your facility website in the second field.
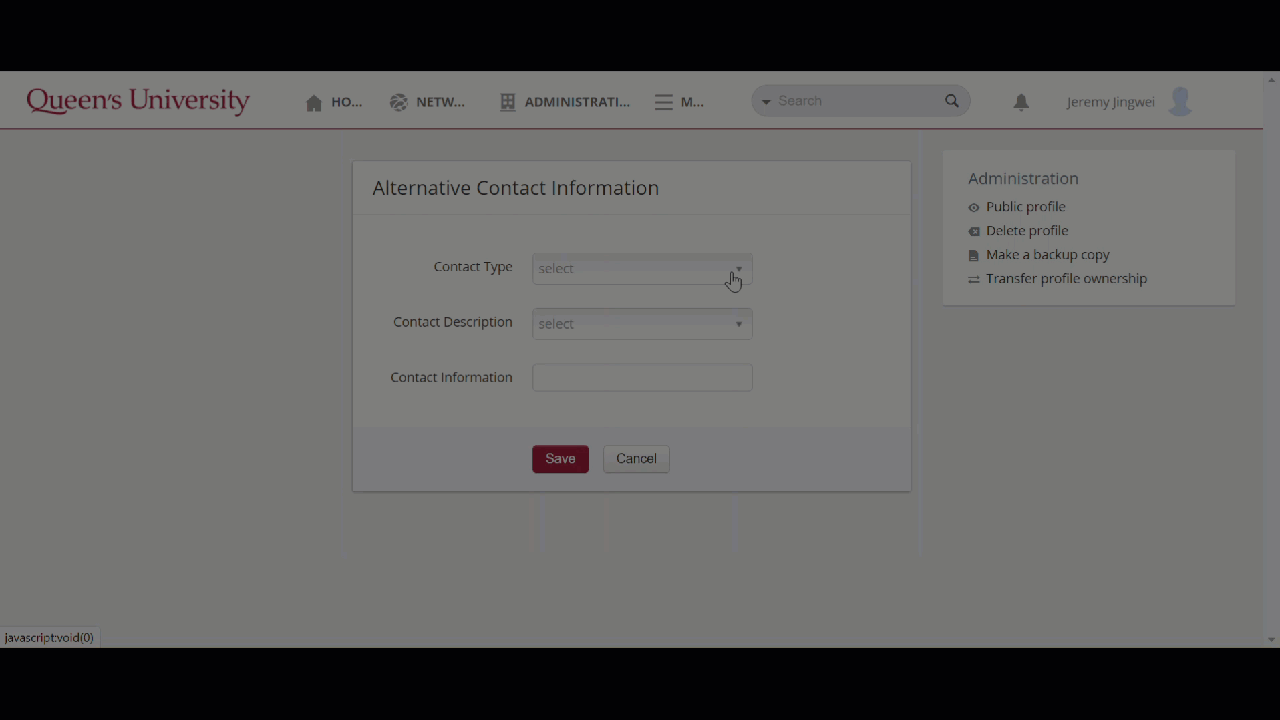
12. If applicable, you can fill out the "Alternative Contact Information" section. First, select the Contact Type (Email or Telephone), then the Contact Description (Fax, Home, Laboratory, Mobile, Pager, Personal, Temporary, or Work), and lastly fill in the email address or telephone number in the Contact Information field.
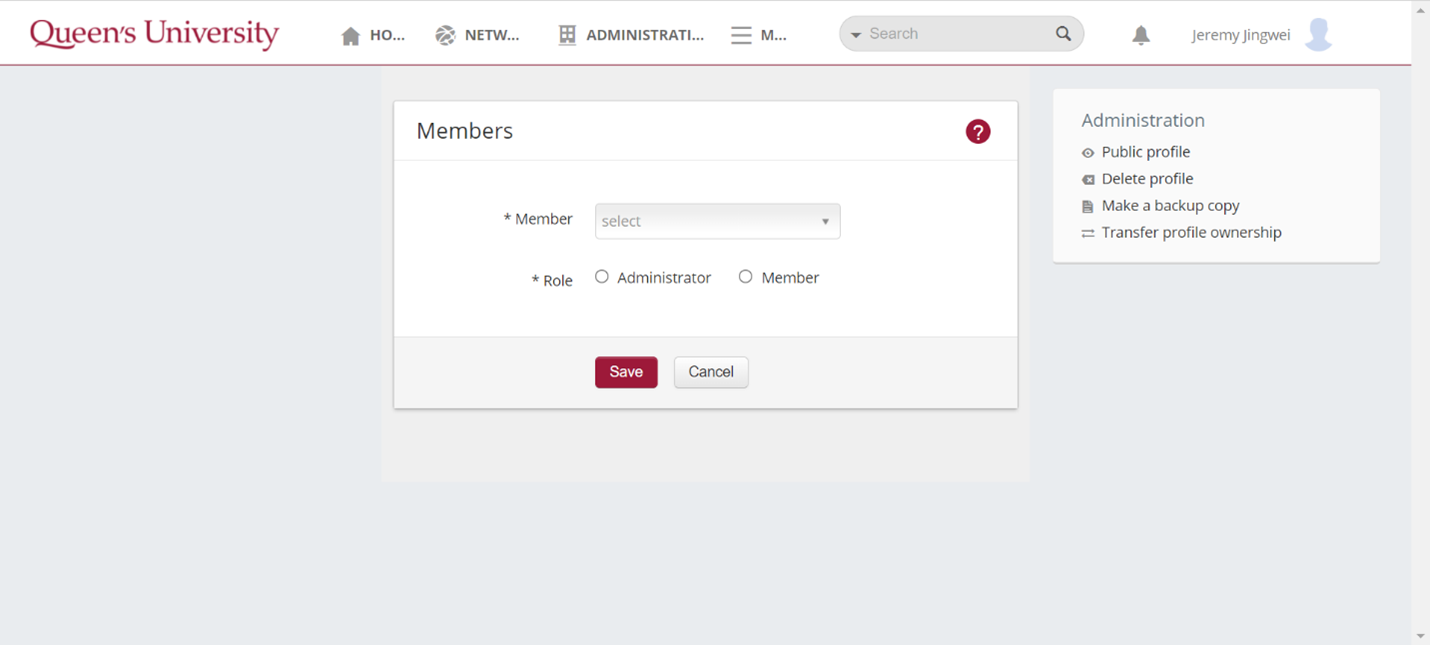
13. To add Members to the resource profile, select the Queen's Research Discovery Network member that you want to add to the page and then select their Role (Administrator or Member). Administrators will have editing and viewing permissions on the resource profile, but members will only have viewing permissions.
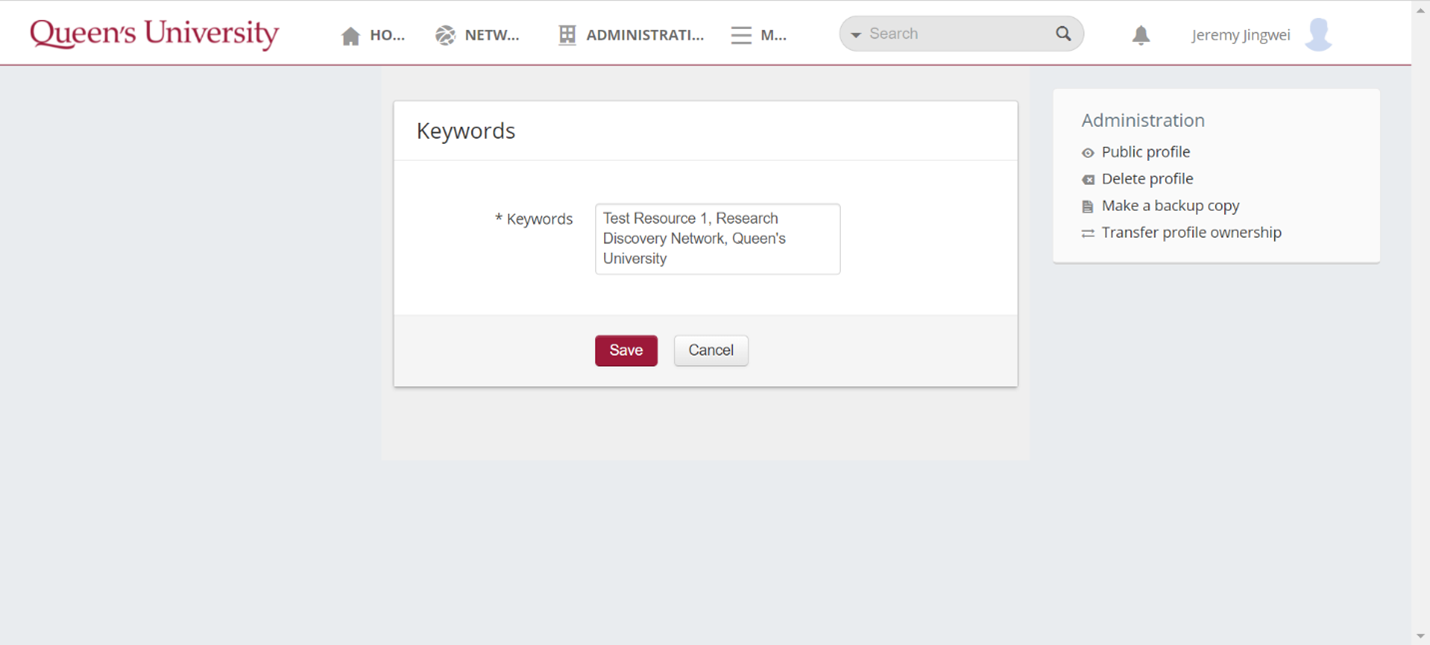
14. Lastly, filling out the Keywords profile section will enhance the searchability of the profile. As a best practice, keywords should include common terms, acronyms or associated words that apply to this resource. Separate keywords using a comma.
Outlined below are several methods to find resources on the Research Discovery Network.
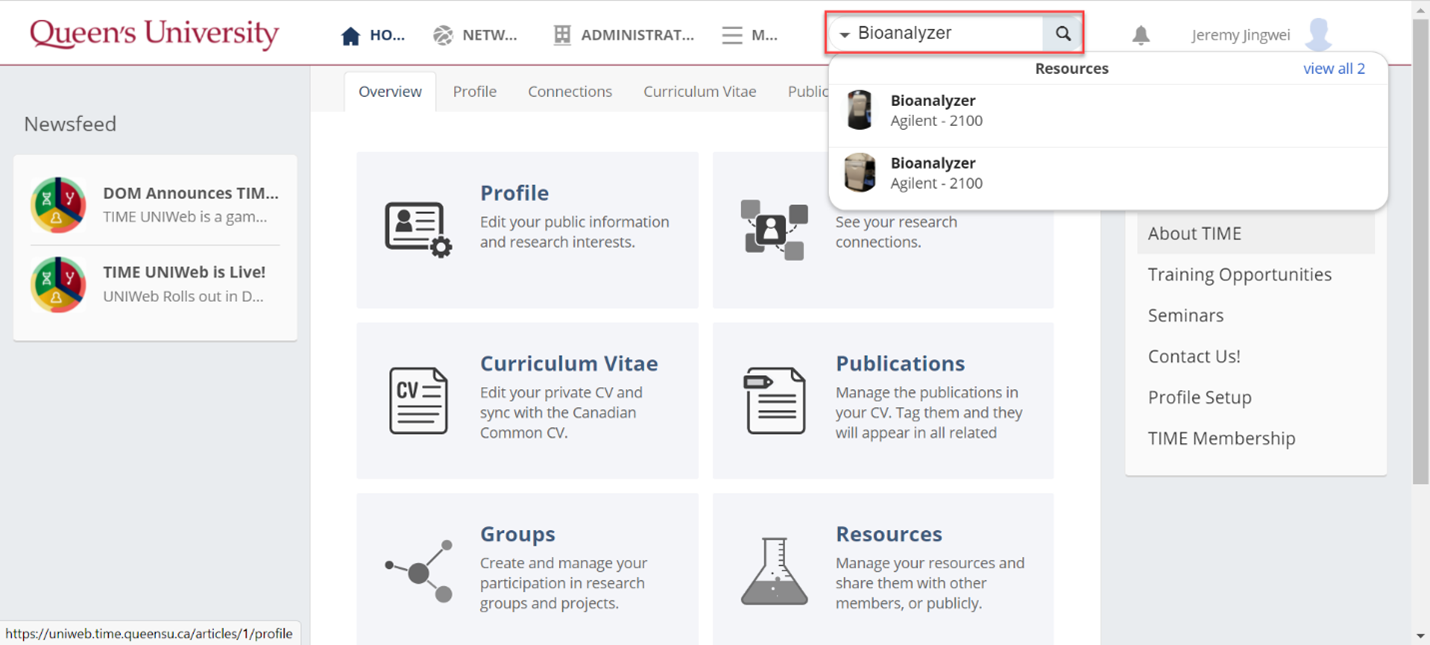
1. If you know the name (or keyword) of a specific resource you are seeking, type it into the search bar and click the corresponding result.
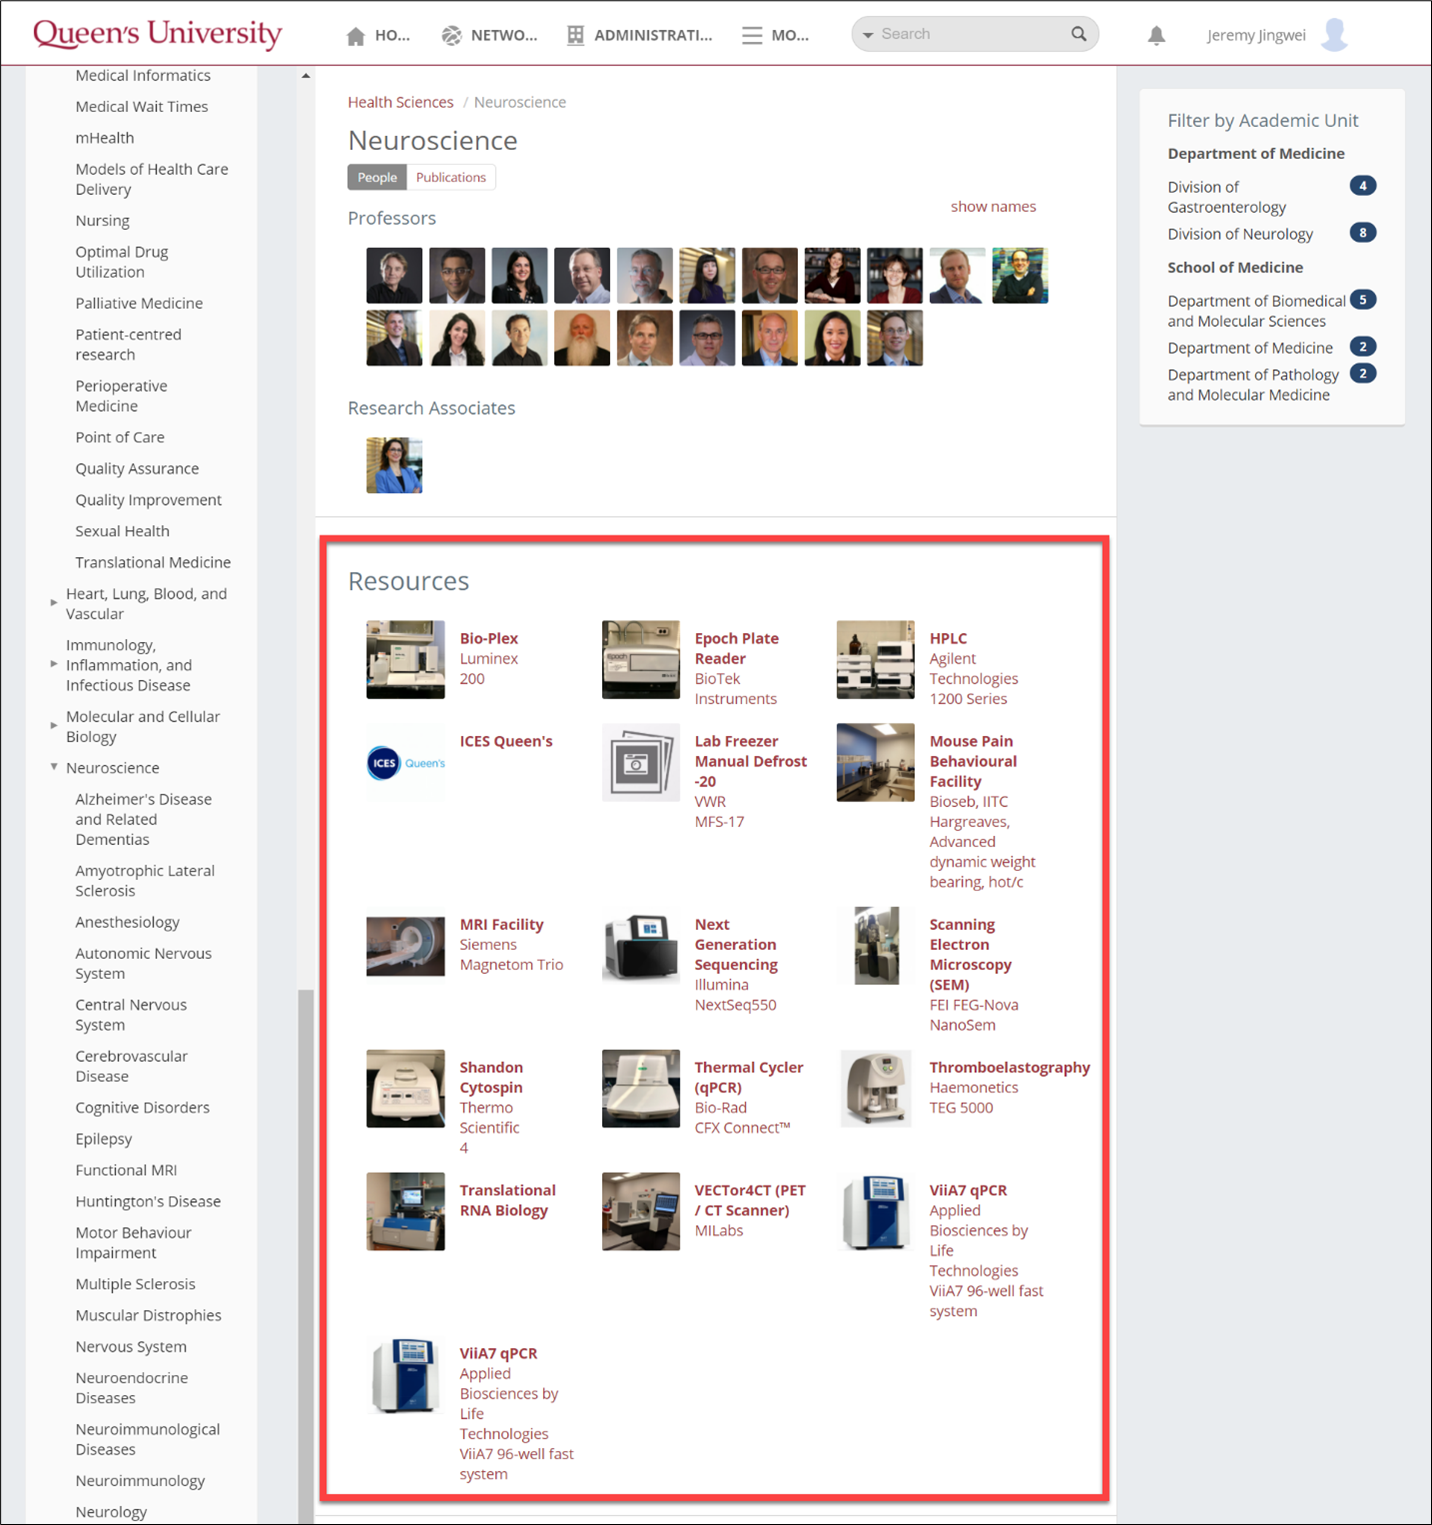
2. If there is a specific research theme that you are seeking research resources for (e.g. Neuroscience), you can select that Research Theme. From there, scroll down to find a list of research resources that are tagged with that specific research theme.

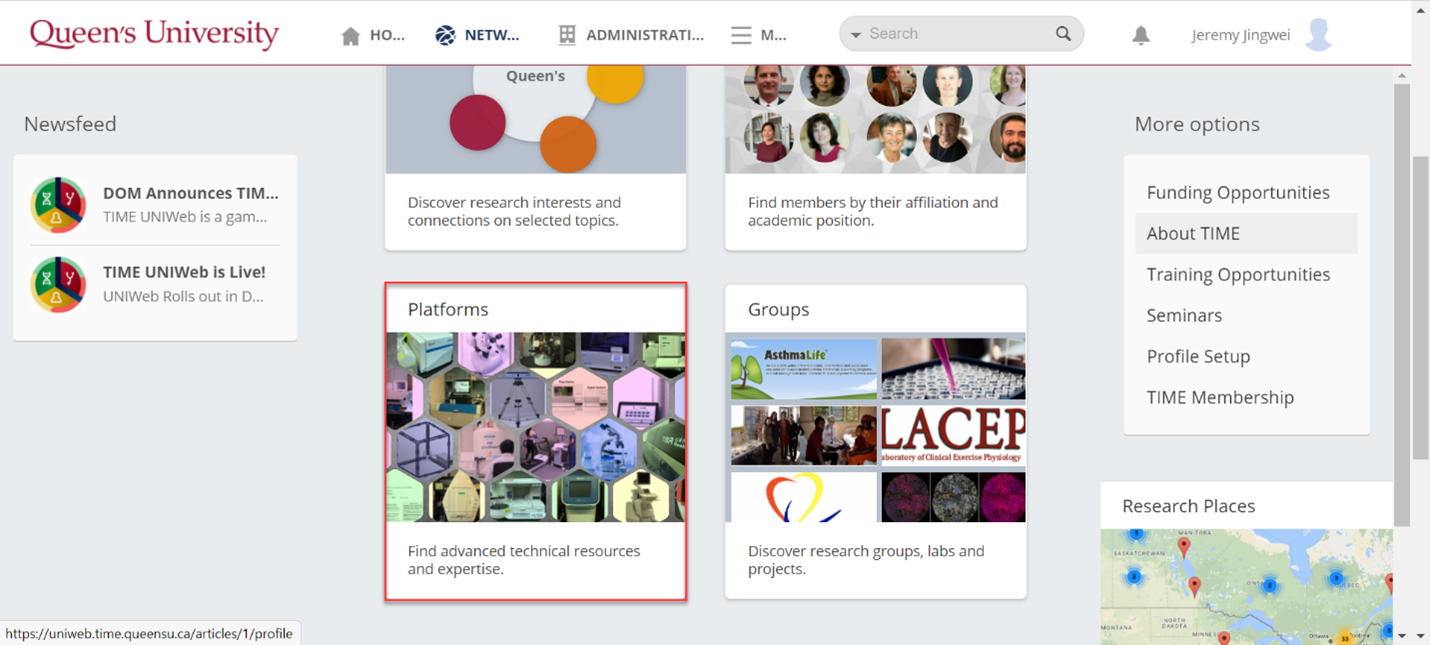
3. Lastly, you can select the "Network" tab on the upper taskbar and then select the "Platforms"" tile. From there, you can parse through various research platforms to find the resource that suits your needs.